

Historic Brick Chimney Repair in Ridgewood, NY: Restoring Deteriorating Mortar on Century-Old Homes
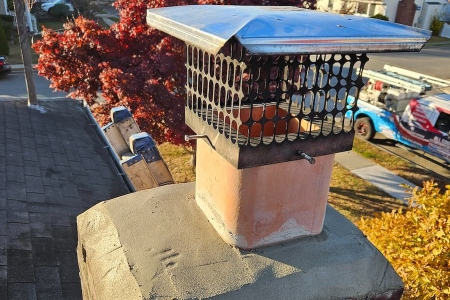
Old Ridgewood brick is beautiful, but it is also soft and porous. When modern repairs ignore that, the chimney pays the price. This guide explains how Queens humidity and freeze‑thaw cycles wear down historic stacks, why lime mortar is often the right match, and the clear signs that tell you it is time to schedule chimney repair with a local masonry specialist who understands century‑old materials.
Across Ridgewood, Glendale, Maspeth, and Middle Village, many two‑ and three‑family homes share the same risk points: exposed stacks above flat roofs, aging flashing, and mortar joints that have weathered a hundred winters. Fixing those weak spots the right way protects your living spaces and preserves original character.
Why Historic Brick In Ridgewood Needs Special Care
Early 20th‑century bricks used on Ridgewood rowhouses were fired cooler than modern units. They breathe, flex, and shed moisture slowly. When they are paired with a hard, rigid mortar, the brick—not the joint—takes the stress. Add in coastal humidity, summer storms off the harbor, and sudden winter thaws along Forest Avenue, and you get a cycle that pries open joints and flakes the brick face.
Historic stacks are designed so the mortar is the “sacrificial” part. The joint should wear first and be replaced, sparing the softer brick. Matching that behavior is the core of long‑lasting repair.
Lime Mortar vs. Portland Cement In Queens Weather
Lime‑rich mortars, common in older construction, offer flexibility and vapor permeability that suit historic brick. Portland‑heavy mixes cure harder and are less forgiving. On a soft brick chimney, a rigid Portland mix can concentrate stress at the brick edge. As moisture cycles through the wall, ice expands and salts migrate, and the brick begins to spall or crack.
The wrong mortar can fracture historic bricks. That is why experienced masons test for hardness, look at sand color and grain, and choose a compatible mix that cushions the brick while keeping water on the move, not trapped inside the stack.
Diagnostic Checklist For Ridgewood Chimneys
Before proposing a rebuild, a pro inspection follows a consistent path. Here is the step‑by‑step checklist our local masons use on Ridgewood homes:
- Interior sweep: trace ceiling stains, check the firebox and smoke chamber for moisture tracks or soot wash.
- Flue assessment: look for cracked liners, offset tiles, or rust at thimbles that signal hidden internal spalling.
- Roofline focus: scan missing or recessed mortar joints along the top third of the stack where wind exposure is highest.
- Flashing junctions: verify step flashing under the roof covering and counterflashing locked into mortar, not caulked to the face.
- Crown and cap: identify hairline crown cracks, failed drip edges, or undersized caps that funnel water into the flue.
- Brick faces: note flaking or “sugaring” on windward sides, especially near parapets and crickets behind the stack.
- Moisture mapping: follow efflorescence trails on attic masonry and party walls that share loads with a neighbor.
If multiple red flags appear together—recessed joints at the roofline, failed counterflashing, and interior flue damage—that is a strong sign the chimney needs structural intervention by a local masonry team, not a surface patch.
What Soft Brick Damage Looks Like On Ridgewood Rowhouses
Homeowners along Fresh Pond Road and the Myrtle Avenue corridor often first notice white streaks on the stack or sand‑like debris at the base. Up close, you might see thin shell pieces popping off the faces or stair‑step cracks that follow the joint pattern. Indoors, smoke odors after rain can hint at liner damage. These patterns usually point to moisture trapped by hard repairs or tired flashing, not simply “old age.”
Repair Approach That Respects Historic Brick
Good chimney work on a century‑old home is deliberate. The goal is to restore function and preserve material, not just make it look new. Here is how a qualified crew proceeds:
- Selective demo: remove only failed joints and broken units. Save sound bricks for reuse on visible faces.
- Mortar matching: confirm hardness, color, and joint profile. Use a lime‑forward mix with well‑graded sand for breathability and a proper bond.
- Tight repointing: cut joints to a uniform depth, dampen the wall, and place mortar in compact lifts for a dense, weather‑resistant joint.
- Targeted brick replacement: weave in units that match size and texture to avoid “checkerboard” patches.
- Crown rebuild: form a sloped, reinforced crown with a drip edge that sheds water cleanly past the brick face.
When the stack has broader masonry issues—cracks at parapets, loose coping, or crown failure—pairing chimney work with masonry repair helps the whole system shed water as designed.
Local insight: In Queens, late‑summer humidity can saturate joints just before an evening thunderstorm. If you see fresh efflorescence after a sticky week, it often signals active water movement inside the stack. Address it before the first hard freeze so new work cures under gentler conditions.
Roof-To-Chimney Details That Stop Leaks
Most leaks start where metal meets masonry. Step flashing must tuck under the roof covering, and counterflashing must be cut into the mortar joint and sealed, not smeared onto the brick. On the upslope side, a cricket sized to the chimney width splits runoff. A durable crown above and a sound liner inside complete the system. If the flue shows heat or acid damage, pairing the masonry scope with chimney relining protects the rebuilt joints and improves draft.
Do not rely on surface caulk to fix flashing laps. It weathers fast in Queens sun and wind and can trap water behind the metal. Proper, mechanically locked flashing is the fix that lasts.
Queens Weather: When To Plan The Work
Ridgewood’s calendar matters. Spring and early fall usually offer milder temperatures and steadier curing conditions. Work can proceed in other seasons with the right protection, but tight weather windows help lime‑rich mortars set well and limit thermal shock on fresh crowns. Planning ahead also prevents small problems from turning into indoor leaks when nor’easters sweep across the borough.
For homeowners near Glendale and Maspeth, think in systems. A small crown crack, recessed joints near the roofline, and a little flashing gap might look unrelated, but together they move water straight into living spaces. Coordinating chimney and roof details in one visit reduces repeat access and keeps interiors dry.
How To Choose A Local Masonry Team
Not all chimney contractors work on historic brick every week. Ask for proof points that separate commodity fixes from preservation‑minded repairs:
- Material compatibility: a written plan describing the mortar type and why it matches your existing joints.
- Method: joint prep depth, compaction steps, and how they will protect adjacent bricks during tooling.
- Moisture strategy: how flashing, crown, and liner repairs combine to stop water paths, not just mask symptoms.
- Samples: a test panel for color and profile on a less‑visible face before full production.
- Coordination: one team or clear sequencing for masonry, flashing, and relining to avoid gaps between trades.
It also helps when your contractor understands the fabric of Ridgewood’s housing stock. Attached homes share loads and water paths along party walls. A careful inspection includes neighboring conditions and the way the roof drains around the stack.
Protecting Living Spaces While Preserving Character
Your goal is simple: keep water out of your home without losing the story your brick tells. A well‑planned scope often starts with repointing the upper third of the stack using a lime‑based mortar, rebuilding a cracked crown with a proper drip edge, resetting counterflashing into the joints, and addressing any flue issues. That combination handles the usual Ridgewood wear points while respecting the original materials.
If you are unsure where to start, review your notes against the checklist above. If you can confirm recessed joints at the roofline, failed counterflashing, and signs of internal spalling, you are past the point of quick patches. Begin with a comprehensive inspection and a plan that treats the chimney as a system.
For more background on what full‑service help looks like, see how Grandstone approaches chimney repair in Ridgewood, NY across exterior masonry, flashing, and interior flue safety. That overview can help you compare proposals apples‑to‑apples and avoid short‑term fixes.
Ready To Restore Your Historic Chimney In Ridgewood, NY?
If your brick chimney shows missing joints at the roofline, flashing gaps, or hidden flue damage, it is time to bring in a team that respects historic materials and Queens weather. Start with a detailed inspection and a clear work plan for your home in Ridgewood, Glendale, Maspeth, or Middle Village. Call Grandstone at 718-717-1371 or schedule expert chimney repair today. We will match the right mortar, rebuild what time and weather have taken, and keep your living spaces dry and safe.
